10 FineHaircut Ideas for Medium Length Hair

10 FineHaircut Ideas for Medium Length Hair

Medium-length hair is the ultimate “sweet spot” in the world of styling. It is long enough to pull back into a chic ponytail or a messy bun, yet short enough to maintain with relative ease and avoid the weight that often plagues longer manes. Whether you are looking to embrace movement, add volume to fine strands, or simply refresh your everyday look, there is a medium-length cut that can transform your silhouette. This length acts as a versatile canvas, capable of shifting from professional and polished to bohemian and relaxed with just a few styling tweaks. If you have been stuck in a style rut, it is time to explore the potential of your shoulder-grazing locks. From timeless classics to modern, textured shags, here are ten haircut ideas designed to inspire your next salon visit and keep your hair looking fresh, vibrant, and perfectly tailored to your lifestyle.
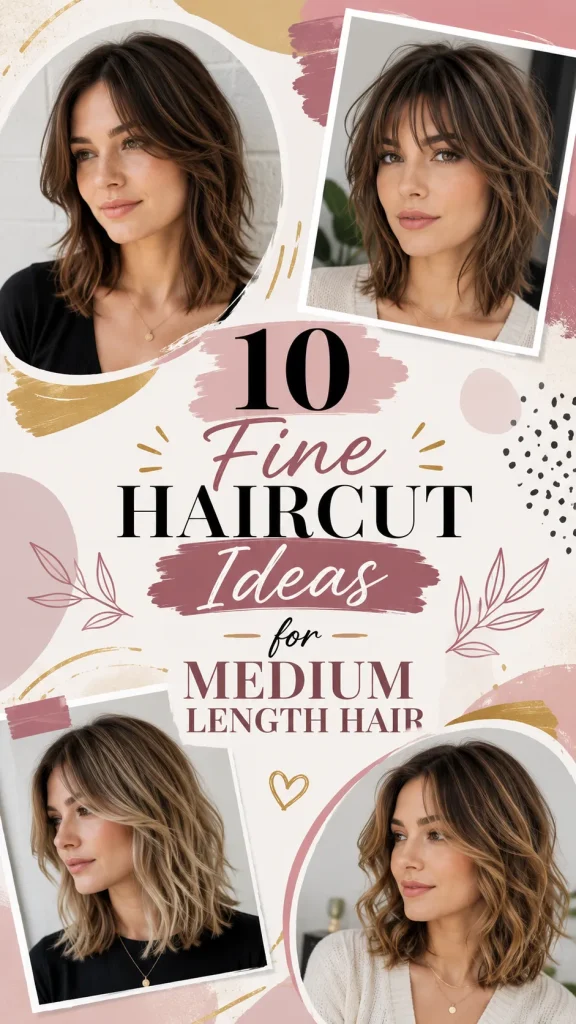
1. The Textured Lob with Soft Layers

The long bob, or “lob,” remains a timeless favorite for a reason. By adding soft, internal layers, you break up the bluntness of the cut, which creates movement and prevents the hair from appearing too heavy or rigid. This is an incredibly versatile choice that complements almost any face shape, offering a polished look that requires minimal daily maintenance. It is the perfect starting point for someone transitioning from longer hair who wants a significant change without feeling like they have lost all their styling options.

How to Make

Begin by having your stylist cut the length to hit just below the collarbone, ensuring the ends remain textured rather than perfectly blunt. To achieve the soft layering, use a point-cutting technique throughout the mid-lengths, which removes excess bulk while maintaining the overall shape. For styling, apply a lightweight sea salt spray to damp hair and let it air-dry for a natural, “lived-in” wave. Alternatively, use a large-barrel curling iron to add just a few gentle bends, focusing on the mid-shaft, to highlight the texture and give the cut a soft, bouncy finish.

Things Needed

  • Professional shears
  • Point-cutting comb
  • Lightweight sea salt spray
  • Large-barrel curling iron
  • Smoothing cream (for ends)

2. The Modern Shag

Drawing inspiration from the retro vibes of the 70s, the modern shag is all about texture, volume, and deliberate “messiness.” It features shorter, piecey layers around the crown and longer, feathered layers toward the ends. This cut is brilliant for those with naturally wavy or curly hair, as the layering structure encourages your hair’s natural pattern to spring to life. It’s an edgy, high-fashion look that feels effortlessly cool and provides a lot of “oomph” without needing to spend an hour styling your hair every morning.

How to Make

The secret to the modern shag is the layering pattern. Ask your stylist for choppy, shorter layers around the crown to build height, and longer, wispy layers that frame the face. The ends should be razor-cut for a soft, feathered finish. To style, apply a texturizing mousse to damp hair and diffuse it dry, scrunching the ends as you go to build volume. Use a small amount of pomade or styling wax on your fingertips to define the individual pieces and add a bit of “grit” to the final look.

Things Needed

  • Professional razor or thinning shears
  • Texturizing mousse
  • Hair dryer with diffuser attachment
  • Styling wax or pomade
  • Wide-tooth detangling comb

3. Blunt Cut with Hidden Layers

If you love the sophisticated, clean lines of a blunt cut but find that it feels too heavy, the “hidden layer” technique is your solution. This involves keeping the perimeter of your medium-length hair blunt and solid, but adding invisible, weight-removing layers on the underside. The result is a cut that looks incredibly dense and thick at the ends, while feeling surprisingly light and airy. This is a fantastic option for those with thick hair who want a structured look that doesn’t feel like a heavy weight on their shoulders.

How to Make

Ask your stylist to keep the ends cut in a sharp, straight line. To manage the bulk, they should use thinning shears on the interior sections of your hair, starting about three inches from the ends. This creates an “invisible” support system that allows the hair to sit flat and sleek. When styling, use a flat iron for a perfectly straight, mirror-like finish. Because the blunt ends are so clean, any flyaways will be noticeable, so finish with a high-shine serum to keep everything looking polished and purposeful.

Things Needed

  • Professional thinning shears
  • High-quality flat iron
  • Heat-protectant spray
  • High-shine serum
  • Paddle brush for smoothing

4. The Face-Framing “Curtain” Cut

This style is all about drawing attention to your features. By keeping the length of your medium hair relatively uniform and adding long, sweeping curtain bangs, you create an instant frame for your face. This cut is exceptionally flattering and offers a soft, romantic silhouette that feels very modern. It is an excellent choice if you want to keep your length but desire a change that feels fresh and highlights your eyes or cheekbones without the commitment of traditional, blunt-cut bangs.

How to Make

Cut the main length of your hair to sit at or just above your shoulders. For the curtain fringe, part your hair in the center and ask your stylist to cut the bangs to chin length, graduating downward to blend into the rest of your hair. When styling, use a round brush to blow-dry the bangs away from your face. This creates the signature “swoop” that defines the curtain look. Finish by gently curling the ends of the rest of your hair under, which creates a soft, feminine frame that feels cohesive and stylish.

Things Needed

  • Round brush (medium size)
  • Hair dryer with nozzle
  • Professional haircutting shears
  • Volumizing root lift spray
  • Sectioning clips

5. Subtle A-Line Bob

The A-line bob is a classic for a reason: it is structured, sharp, and incredibly slimming. For medium length, the A-line should hit just at the collarbone in the front and be slightly shorter at the nape of the neck. This gradual slope creates a beautiful, elegant line that elongates the neck and highlights the jaw. It is a very professional cut that looks great on almost everyone, providing a sense of order and style that is easy to manage while still having enough length to experiment with various updos.

How to Make

The precision of the A-line depends on the angle of the cut. Have your stylist cut the back at the nape, then gradually lengthen the hair as they move toward the front. Ensure the back is layered slightly to keep it from looking too boxy. To style, use a flat brush to pull the hair toward your chin while blow-drying, which encourages the natural “tuck” of the A-line shape. Use a light styling cream to keep the ends smooth and ensure the line of the bob remains sharp and defined.

Things Needed

  • Professional cutting shears
  • Flat brush
  • Light styling cream
  • Hair dryer
  • Sectioning clips for precision cutting

6. Feathered Ends for Movement

If your medium-length hair feels like it’s just “sitting” there, adding feathered ends is a great way to introduce movement. Feathering involves using a razor or specific cutting technique to taper the ends of the hair, making them look wispy and soft. This is especially effective if you have naturally straight hair that tends to look flat. It adds a “flickable” quality to the ends, giving your hair a more dynamic and energetic feel that is perfect for those who want a light, playful look.

How to Make

While the main length of the hair should be kept in long layers, the actual ends of the hair should be cut with a razor to achieve the feathered effect. This makes the tips look soft and porous. When styling, use a large round brush to blow-dry the ends outward. This emphasizes the feathering and creates a soft, airy movement. Finish with a flexible-hold hairspray to ensure the ends stay “flicked” and don’t fall flat, giving you that bouncy, light-hearted aesthetic all day long.

Things Needed

  • Professional razor tool
  • Large round brush
  • Flexible-hold hairspray
  • Detangling mist
  • Hair dryer with nozzle

7. The Deep Side-Parted Layered Cut

Sometimes, the haircut is all about the styling potential. A layered cut designed for a deep side part is a fantastic way to add volume and drama to medium-length hair. By keeping the layers long and sweeping, you allow yourself the flexibility to flip your hair over for a deep, voluminous side-swept look. This cut provides a lot of body at the roots and creates a sweeping silhouette that is both glamorous and incredibly easy to manage, making it a top contender for anyone looking to add a bit of “wow” factor to their daily style.

How to Make

Ensure your layers are cut long—starting at the cheekbone and continuing down to the ends. When you get your hair cut, ask your stylist to blow-dry it with a deep side part so they can see exactly where the hair needs to be layered to create the most volume. To style, use a volumizing root spray on damp hair, and blow-dry using a large round brush, lifting at the roots. Flip your hair over to the side, and use a bit of dry shampoo for extra grip and lift at the crown.

Things Needed

  • Volumizing root spray
  • Dry shampoo
  • Large round brush
  • Professional shears
  • Hair dryer

8. Rounded Layers for Volume

If you have fine hair that lacks body, rounded layers are the perfect solution. Unlike standard layers that might thin out the ends, rounded layers follow the shape of your head, building volume throughout the mid-lengths. This technique makes your medium-length hair appear much fuller and thicker than it actually is. It is a very flattering, soft cut that provides plenty of bounce and movement, ensuring your hair doesn’t just hang limply. It’s an ideal choice for a sophisticated, healthy-looking mane.

How to Make

Ask your stylist for layers that are “rounded” rather than choppy. They should cut the hair in a way that respects the natural curve of your head. This prevents the “stairstep” look that often happens with poorly executed layering. When styling, use a hot-air brush to create volume, curling the ends slightly under. This reinforces the rounded, voluminous shape of the layers. Use a light, non-greasy mousse before drying to give the hair extra body without weighing it down, keeping it looking light, soft, and bouncy.

Things Needed

  • Hot-air styling brush
  • Light mousse (for fine hair)
  • Professional shears
  • Sectioning clips
  • Wide-tooth comb

9. The “Swooping” Long Pixie

A long pixie—or a very short, layered bob—is a bold, daring look that is incredibly stylish at medium-to-short lengths. By leaving the top layers long and “swooping” them over to one side, you create a look that is part-pixie, part-bob. It’s a very modern, fashion-forward cut that is surprisingly easy to style. The key is the layering; by keeping the sides shorter and the top significantly longer, you create a silhouette that is sleek, edgy, and incredibly flattering.

How to Make

Ask your stylist to keep the hair around the ears short and tapered, while leaving the hair on top of the head long enough to sweep across your forehead. Use a texturizing product to define the swooped pieces. To style, use a small flat iron to smooth the longer top pieces, tucking them behind one ear. This cut is all about the contrast between the shorter, tapered sides and the long, sleek top, so keep it polished with a high-quality styling cream.

Things Needed

  • Small flat iron
  • Styling cream for hold
  • Professional shears
  • Tapering comb
  • Hair dryer

10. Blunt Cut with Face-Framing Highlights

A blunt, shoulder-length cut is the ultimate minimalist style. However, to keep it from looking too plain, add face-framing highlights—often called “money pieces.” The blunt cut gives the hair a healthy, thick appearance, while the highlights provide the visual interest and brightness around your face. This is a very “model-off-duty” look that is clean, fresh, and perfectly on-trend. It works best with a center part and a poker-straight finish, highlighting the precision of the cut and the vibrancy of the color.

How to Make

Keep the entire length of your hair blunt, hitting right at the collarbone. For the color, ask for a “money piece”—a bright, face-framing highlight that starts at the root of your front-most sections. This brightens your face and adds a modern touch to the classic blunt cut. To style, use a paddle brush for a straight blow-dry, then finish with a flat iron to ensure the blunt ends are perfectly crisp. A clear glossing spray will enhance the color of your highlights and give your hair that high-end, mirror-like finish.

Things Needed

  • Professional shears for blunt cut
  • Face-framing highlighting kit (or salon color)
  • Paddle brush
  • Flat iron
  • Clear glossing spray

Conclusion

Medium-length hair is a playground of possibilities. Whether you are looking for the structured, sharp look of a blunt bob or the movement and volume of a shag, your current length offers the perfect balance between style and maintenance. The key to loving your medium-length hair is ensuring the cut is tailored to your unique hair texture and lifestyle—don’t be afraid to ask for “weight removal” if you have thick hair, or “rounded layering” if you want to add body to fine strands. Your next haircut should be an investment in how you want to present yourself, so take the time to look for a stylist who understands the specific movement and finish you are after. With the right cut and a few key styling tools, you can keep your shoulder-grazing locks looking fresh, vibrant, and perfectly you every single day.

Comments

No comments yet. Why don’t you start the discussion?

Leave a Reply

Your email address will not be published. Required fields are marked *