Preschoolers are naturally drawn to the bright colors and soft shapes of flowers. Crafting with flowers is more than just fun; it helps children develop pincer grasp strength, explores color theory, and teaches them about the parts of a plant. In 2026, the trend for early childhood education is “Nature-Integrated Art,” where we use everyday materials to mimic the beauty found in our own backyards.
In this guide, we are exploring 10 Flower Crafts Preschool Ideas that are simple, tactile, and designed for small hands. These projects focus on high-success results that build confidence while letting their creativity bloom!
1. Fork-Painted “Zinnia” Blooms
This is a sensory delight for 3 to 5-year-olds. The tines of a plastic fork create the perfect textured petals for zinnias or marigolds, requiring zero “perfect” brush strokes.
- Materials: Plastic forks, washable acrylic paint, green markers.
- Steps:
- Dip the back of the fork into a plate of bright paint.
- Press it down in a circular pattern to create the flower head.
- Once dry, draw a simple green stem and leaves.
Pro Tip: Encourage the kids to “layer” colors by dipping one side of the fork in red and the other in yellow for a beautiful sunset effect.

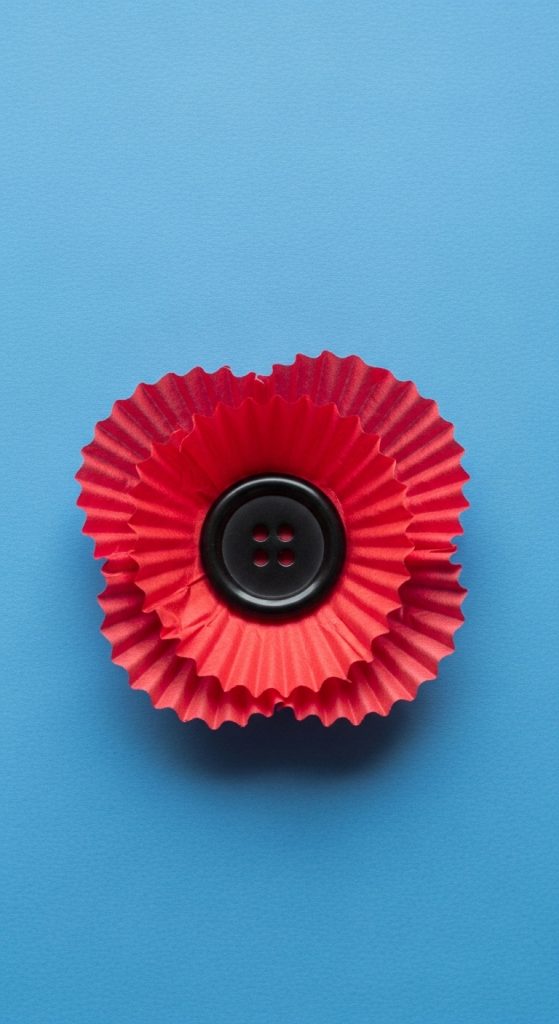
2. Cupcake Liner “Poppies”
Cupcake liners are pre-shaped like flowers, making this a very low-frustration craft for younger preschoolers. The ruffled edges add a wonderful 3D element to a flat piece of paper.
- Materials: Colorful cupcake liners, large buttons, glue.
- Steps:
- Flatten a cupcake liner and glue it to the center of a page.
- Glue a large, bright button in the center to represent the stamen.
- Draw a “fuzzy” green stem using a crayon or marker.
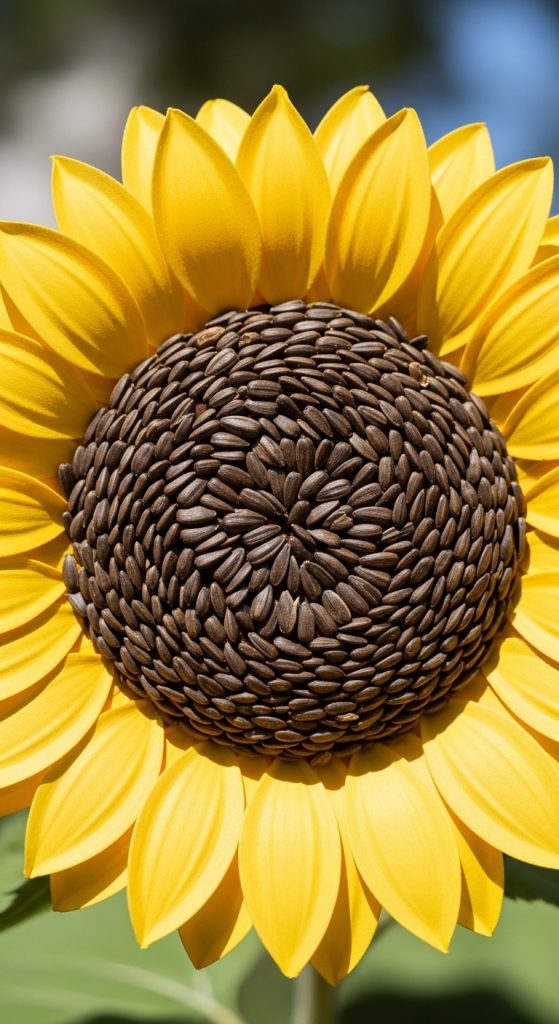
3. Paper Plate “Sunflowers”
This craft is perfect for teaching about size and scale. By using a paper plate as the base, children have a large, sturdy surface to decorate with seeds and petals.
- Materials: Yellow paper plates, brown paint, real sunflower seeds, glue.
- Steps:
- Paint the center of the yellow plate brown.
- While the paint is wet, sprinkle real sunflower seeds into the center.
- Cut small triangular “notches” around the edge of the plate to create petals.
4. Coffee Filter “Watercolor” Lilies
Watching colors “bleed” on a coffee filter feels like a magic trick to a preschooler. This craft is great for exploring how colors mix and move through water.
- Materials: Coffee filters, washable markers, a spray bottle with water.
- Steps:
- Let the child scribble all over the filter with bright markers.
- Spray the filter with water and watch the colors blend into a watercolor wash.
- Once dry, bunch the center and wrap it with a green pipe cleaner.
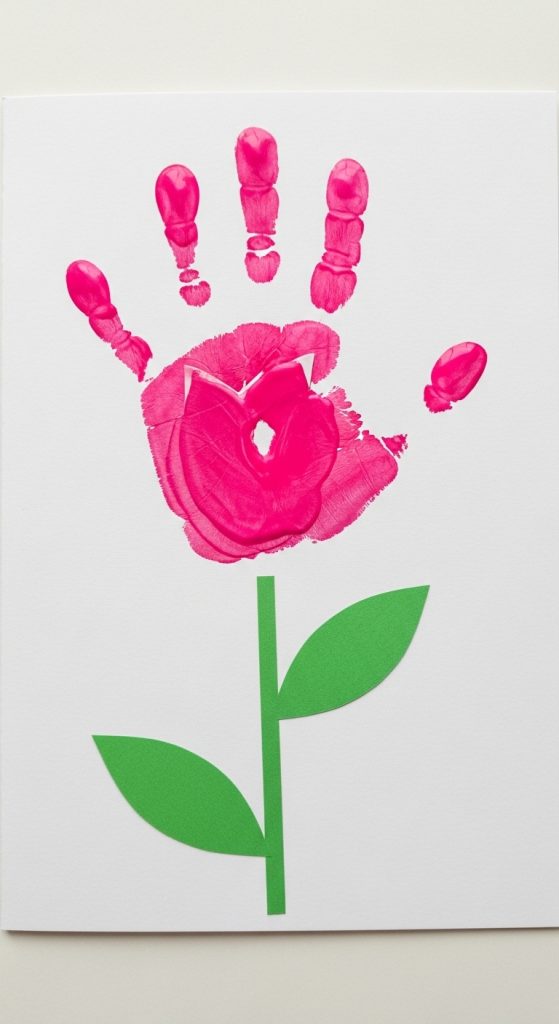
5. Handprint “Growing” Tulips
Parents love handprint crafts because they capture a moment in time. The child’s hand becomes the head of the tulip, making it a precious keepsake.
- Materials: Bright pink or red paint, green paper, white cardstock.
- Steps:
- Paint the child’s palm and fingers and press them firmly on the paper.
- Once dry, cut “V” shapes out of the top of the fingers to create a tulip silhouette.
- Glue on a long green paper stem and wide leaves.
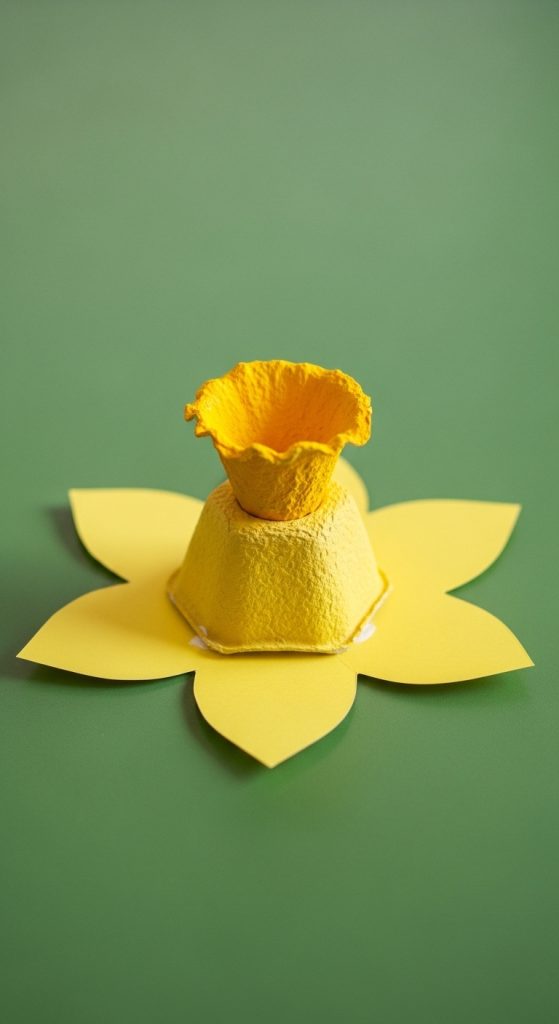
6. Egg Carton “Daffodils”
Don’t toss those cardboard egg cartons! The “cups” are the perfect shape for the center trumpet of a daffodil.
- Materials: Cardboard egg carton cups, yellow construction paper, paint.
- Steps:
- Paint a single egg cup bright yellow.
- Cut a 6-petal flower shape out of yellow paper.
- Glue the egg cup into the center of the paper petals to create a 3D daffodil.
7. Fingerprint “Hyacinths”
Hyacinths are known for their clusters of tiny blossoms. Preschoolers can use their fingertips to “stamp” a tall stalk of colorful flowers, which is great for fine motor control.
- Materials: Purple, pink, or blue paint, white paper.
- Steps:
- Draw a thick green line for a stem.
- Have the child dip their finger in paint and make dozens of “dots” all around the top half of the stem.
- The result is a thick, textured cluster of flowers.
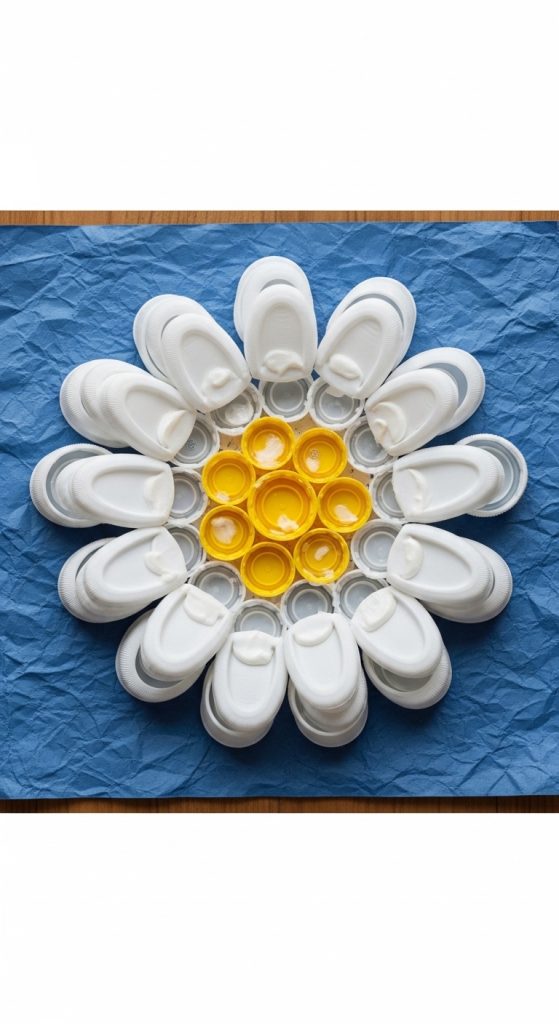
8. Bottle Cap “Recycled” Daisies
This craft teaches kids about recycling while making something beautiful. The plastic caps from milk or juice bottles create a sturdy, tactile flower.
- Materials: Recycled plastic bottle caps, glue, construction paper.
- Steps:
- Glue one yellow bottle cap in the center.
- Glue 5 or 6 white (or colorful) caps around it to form the petals.
- Draw the stem and leaves to finish the garden.
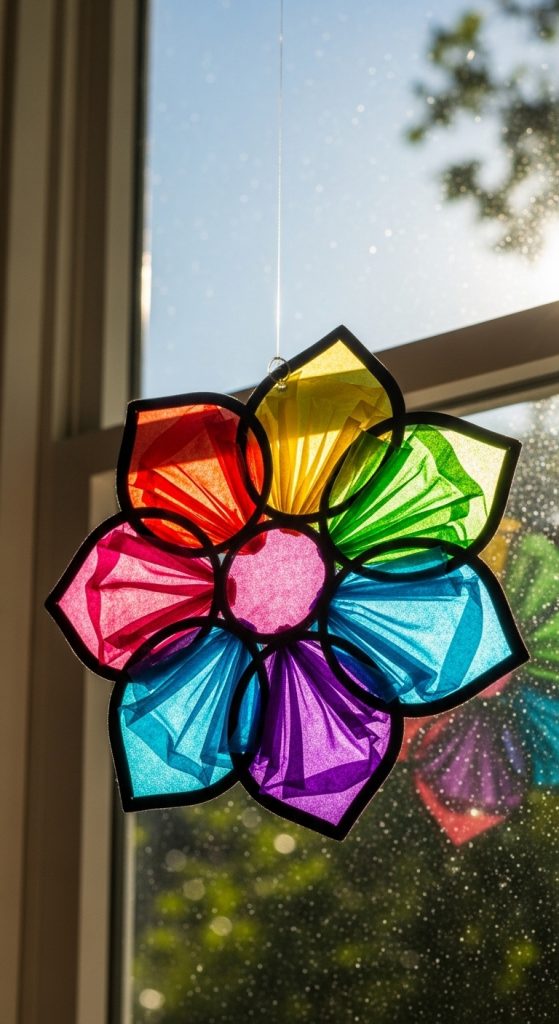
9. Tissue Paper “Suncatcher” Flowers
These look beautiful when taped to a classroom window. The light shines through the tissue paper like stained glass.
- Materials: Clear contact paper, colorful tissue paper squares, black construction paper.
- Steps:
- Cut a flower “frame” out of black paper.
- Place it on a piece of sticky contact paper.
- Let the child fill the empty petals with colorful tissue paper squares.
- Seal with another piece of contact paper and trim the edges.
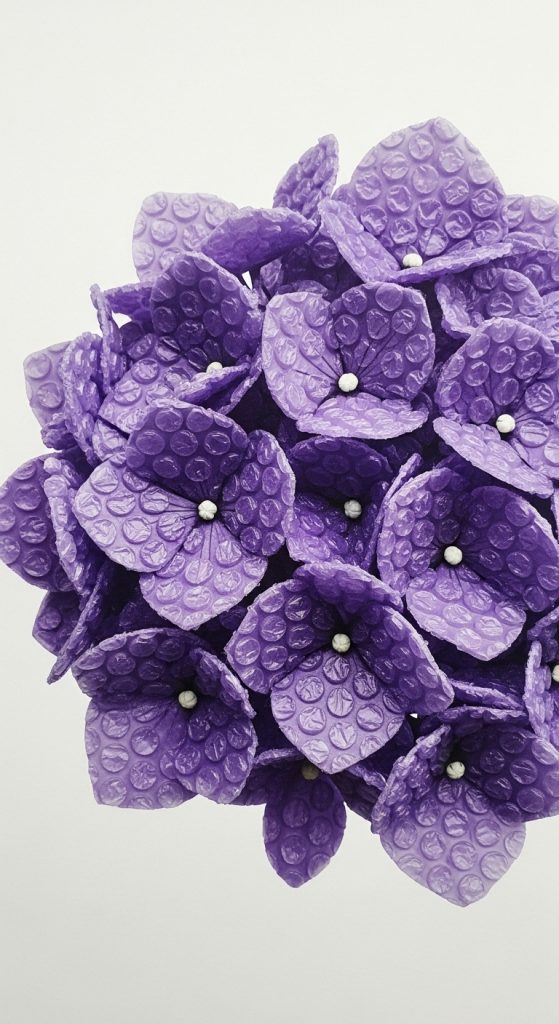
10. Bubble Wrap “Hydrangeas”
Bubble wrap creates a unique “dotted” pattern that perfectly mimics the look of a full hydrangea head. It’s a fun sensory tool that kids love to “squish” onto the paper.
- Materials: Bubble wrap (cut into circles), blue and purple paint, paper.
- Steps:
- Paint the “bumpy” side of a bubble wrap circle.
- Press it onto the paper like a stamp.
- Lift it up to reveal a beautiful, textured hydrangea bloom.
Tips for Preschool Crafting Success
- Master the Glue: Teach the “Dot, Dot, Not a Lot” rule. Putting a tiny dot of glue on the paper is better than squeezing a giant puddle!
- Set the Stage: Preschoolers are enthusiastic painters. Tape their paper down to the table so it doesn’t move while they are working.
- Focus on Process: If their flower has six stems and no petals, that’s okay! At this age, the exploration of materials is the most important part.