Butterflies are a favorite in the crafting world because they allow for endless color combinations and symmetrical patterns. In 2026, kids’ crafts are leaning into “Eco-Play,” where we use everyday recycled items to create something beautiful. Crafting butterflies isn’t just about art; it’s a great way to talk about metamorphosis, nature, and the concept of symmetry.
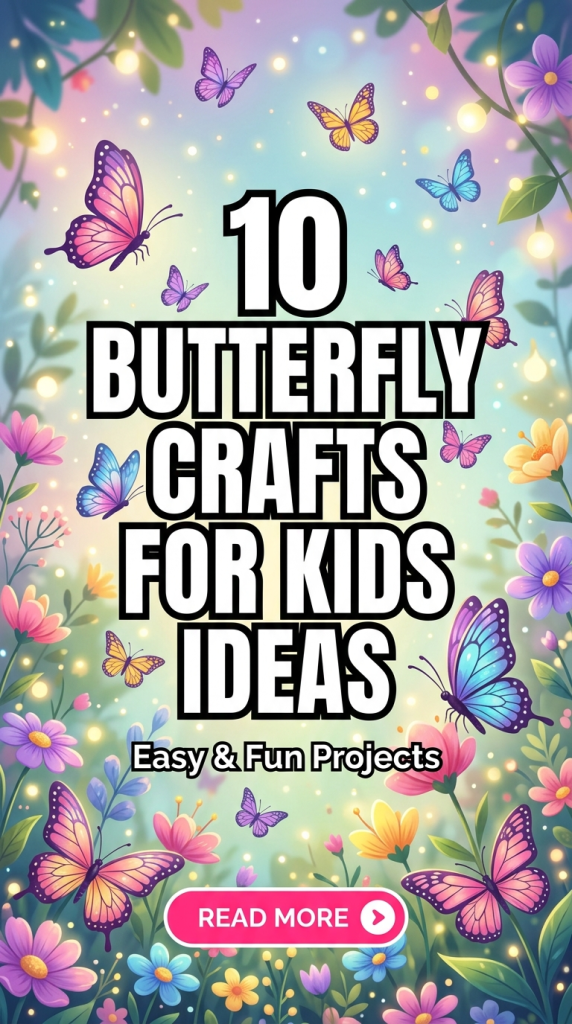
In this guide, we are exploring 10 Butterfly Crafts For Kids Ideas that range from simple paper plate designs to “stained glass” window art. These projects are easy, high-impact, and perfect for a rainy afternoon or a spring classroom activity. Let’s get those wings flapping!
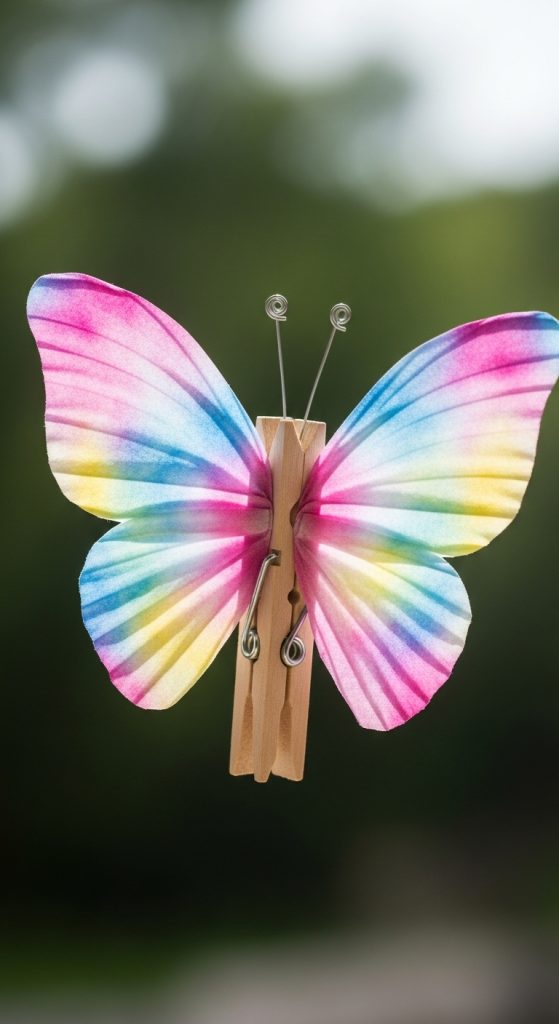
1. The Classic Tie-Dye Coffee Filter Butterfly
This is a childhood staple because it feels like a magic trick. When you spray water on marker scribbles, the colors bleed together to create a soft, watercolor effect that mimics the delicate veins of real butterfly wings.
- Materials: Coffee filters, washable markers, spray bottle with water, clothespins.
- Steps:
- Scribble all over a coffee filter with bright markers.
- Mist the filter with water and let it dry completely.
- Bunch the filter in the middle and clip it with a clothespin “body.”
- Pro Tip: Draw a small face and two antennae on the top of the clothespin to give the butterfly more personality.
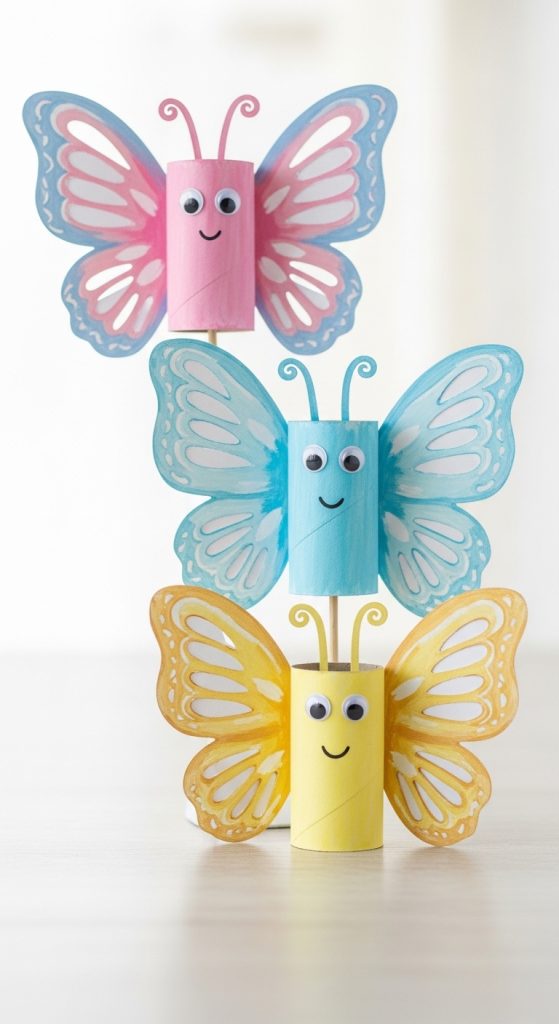
2. Cardboard Tube “Flutter” Butterflies
Don’t throw away those toilet paper or paper towel rolls! They make the perfect sturdy body for a butterfly that can stand up on a shelf or a nightstand.
- Materials: Cardboard tubes, construction paper, glue, googly eyes.
- Steps:
- Paint the tube a solid color or wrap it in paper.
- Cut two large “B” shapes out of contrasting paper for the wings.
- Glue the wings to the back of the tube and add googly eyes to the front.
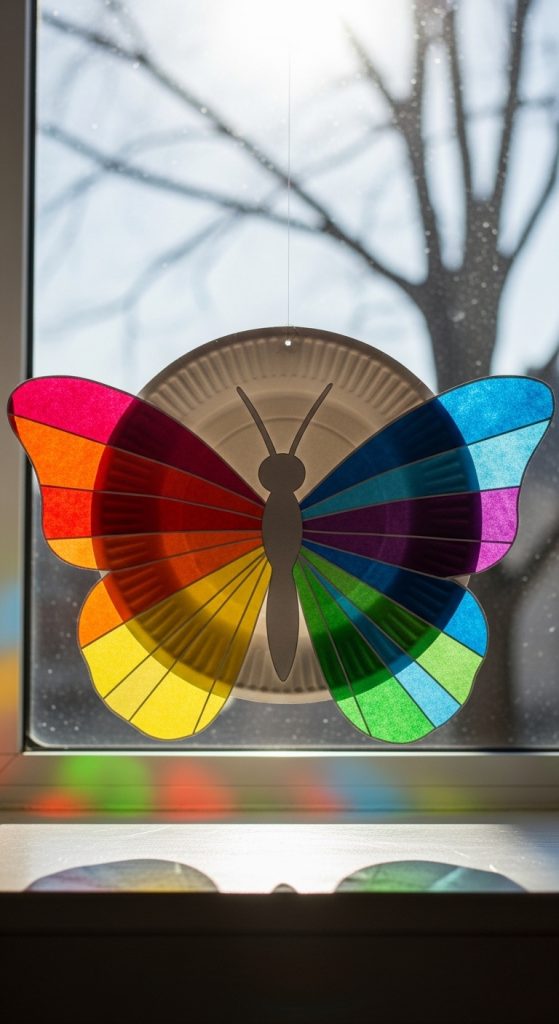
3. Paper Plate “Stained Glass” Wings
These look stunning when the light shines through them. By cutting out the center of a paper plate, you create a “frame” for a colorful, translucent wing design.
- Materials: Paper plate, clear contact paper, colorful tissue paper squares.
- Steps:
- Cut the paper plate in half and cut a large “hole” out of each half.
- Seal the holes with contact paper (sticky side out).
- Let the kids press tissue paper squares onto the sticky surface.
- Glue the two halves to a central craft stick body.
4. Symmetry “Squish” Painting
This is a fantastic way to teach kids about symmetry. Since a butterfly’s wings are identical on both sides, “squish painting” creates a perfect mirror image every time.
- Materials: White paper, washable paint in tubes.
- Steps:
- Fold a piece of paper in half and open it back up.
- Squeeze several drops of paint on only one side of the fold.
- Fold the paper and press down firmly (the “squish”).
- Open it up to reveal a perfectly symmetrical butterfly!
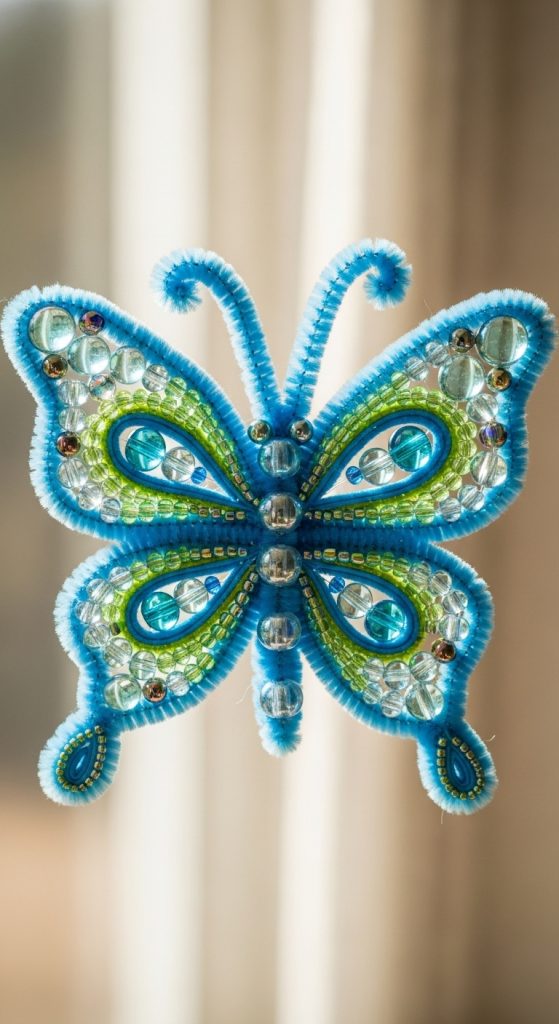
5. Beaded Pipe Cleaner Butterflies
This craft is excellent for fine motor skills. Threading beads onto pipe cleaners helps kids with hand-eye coordination while creating a shimmering, textured friend.
- Materials: Two pipe cleaners, colorful plastic beads.
- Steps:
- Thread beads onto two pipe cleaners, leaving an inch at each end.
- Twist the pipe cleaners into two “loops” (the wings).
- Use a third, shorter pipe cleaner to wrap around the center and create antennae.
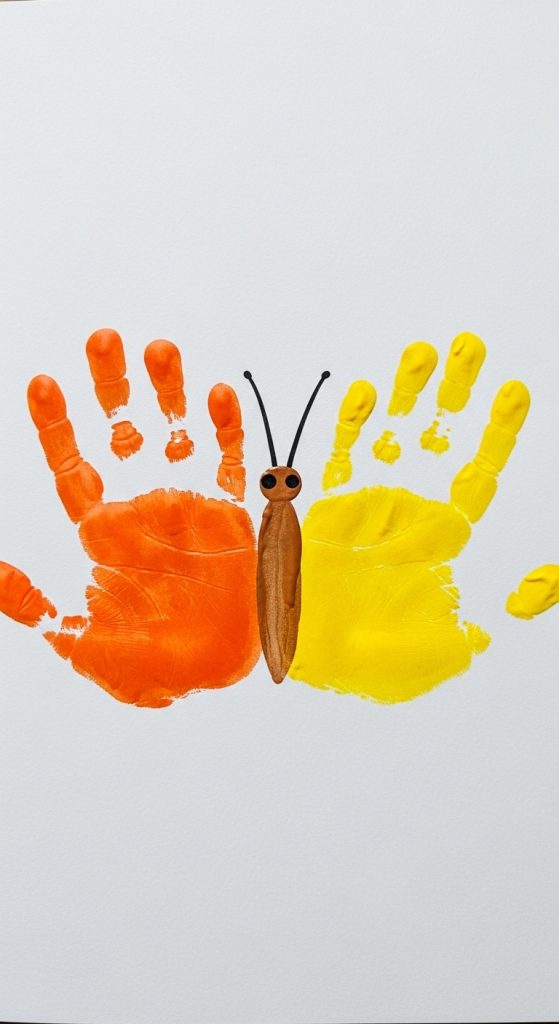
6. Handprint Butterfly Keepsake
Parents love this craft because it captures the size of a child’s hands. The hands become the wings, making it a precious memory of the spring of 2026.
- Materials: Bright paint, white cardstock, markers.
- Steps:
- Paint the child’s palms and fingers.
- Press the left hand on the left and the right hand on the right (thumbs facing in).
- Draw the butterfly’s body and antennae in the middle space between the palms.
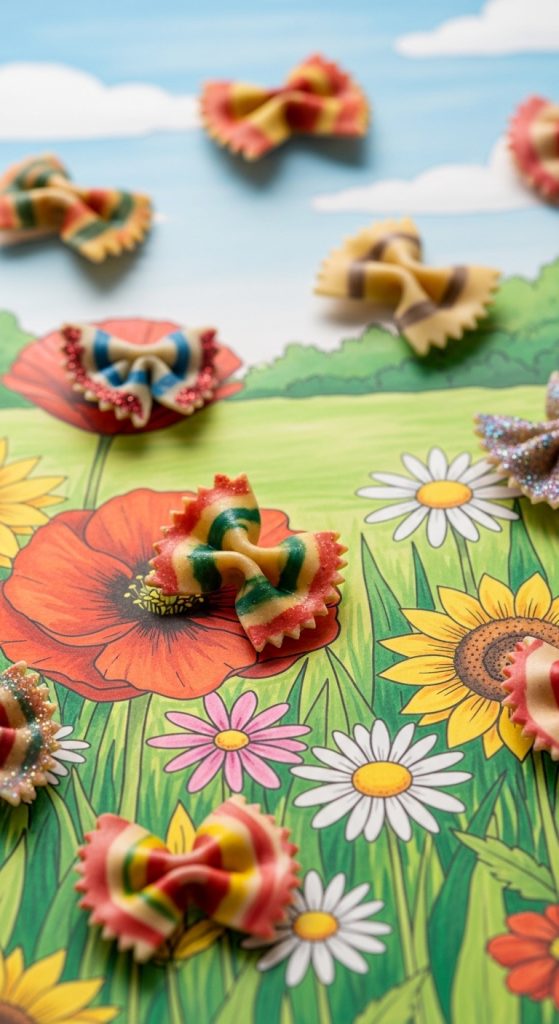
7. Bow-Tie Pasta Butterflies
If you’re looking for a 3D craft that uses pantry staples, Farfalle (bow-tie) pasta is already shaped exactly like a butterfly!
- Materials: Dry bow-tie pasta, acrylic paint, glue, paper.
- Steps:
- Paint the dry pasta in vibrant colors and let them dry.
- Glue the pasta “butterflies” onto a drawing of a garden or a flower.
- Use a fine-liner pen to draw tiny antennae on the paper above the pasta.
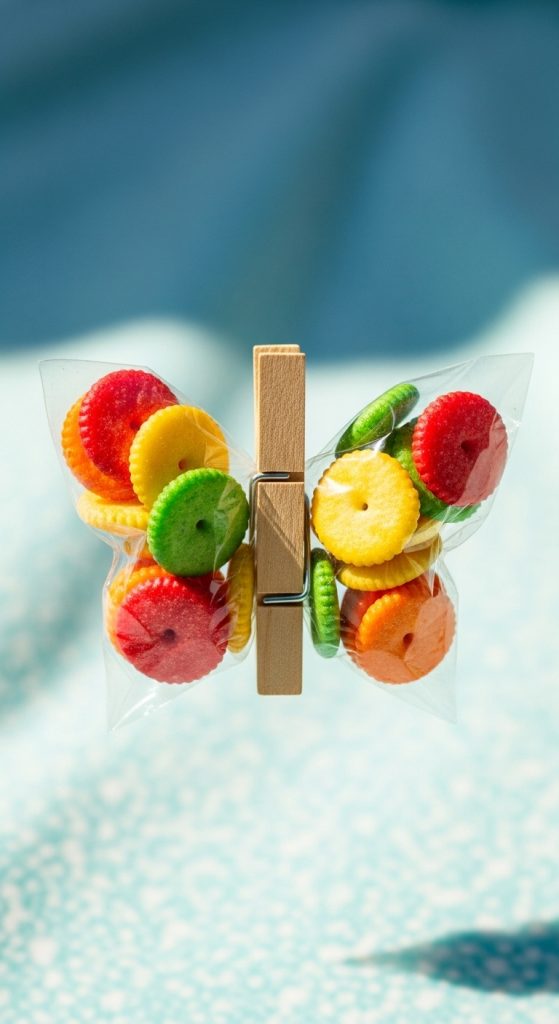
8. Clothespin “Snack Bag” Butterflies
This is a functional craft! These butterflies hold snacks for school lunches or party favors, making them as useful as they are cute.
- Materials: Ziploc bags, clothespins, markers, pipe cleaners.
- Steps:
- Decorate a clothespin with markers and glitter.
- Fill a snack bag halfway with grapes or goldfish crackers.
- Clip the clothespin in the center of the bag to separate the “wings.”
9. Paper Loop Butterflies
This craft creates a fun, bouncy 3D effect. By using loops of construction paper, the wings look like they are popping off the page.
- Materials: Strips of colorful construction paper, glue, cardstock.
- Steps:
- Cut four strips of paper (two long, two short).
- Glue the ends of each strip together to make a loop.
- Glue the loops to a central paper body, with the larger loops on top.
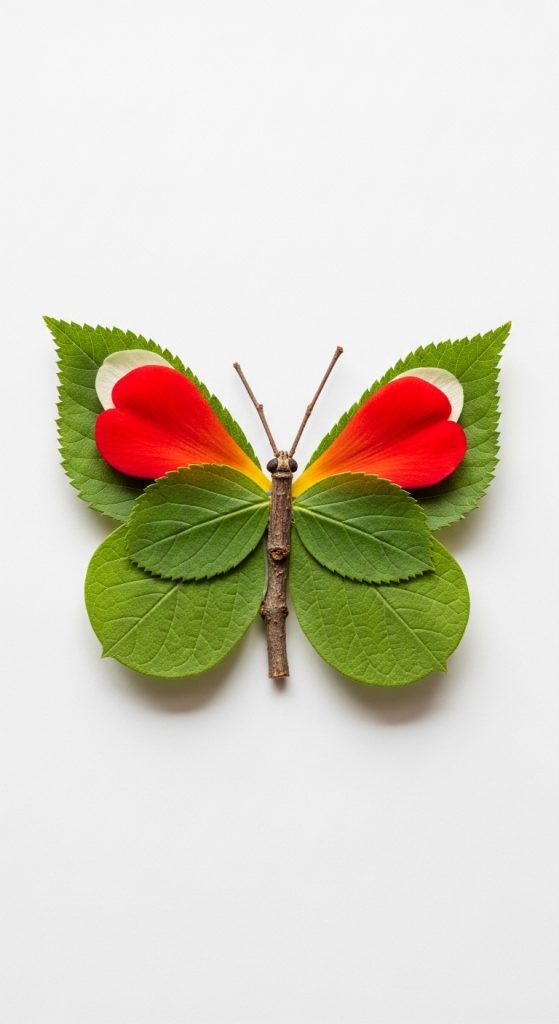
10. Leaf and Petal “Nature” Butterfly
Take the kids on a walk to collect fallen leaves and flower petals. This “temporary art” project uses natural materials to create an eco-friendly butterfly.
- Materials: Leaves of different sizes, flower petals, a twig (for the body).
- Steps:
- Arrange a twig in the center of a piece of paper.
- Use two large leaves for the top wings and two smaller ones for the bottom.
- Decorate the “wings” by gluing colorful flower petals on top of the leaves.
Tips for Butterfly Crafting Success
- Focus on Brightness: Butterflies in nature are vibrant. Encourage kids to use high-contrast colors like orange and teal or purple and yellow.
- Protect the Surface: Many of these involve wet paint or bleeding markers. Use a plastic tablecloth to make cleanup easy.
- Talk about Nature: While you craft, mention that butterflies taste with their feet or that they start as caterpillars—it turns art time into a fun biology lesson!