There is something undeniably cozy about the warm glow of a lantern, but retail versions often come with a heavy price tag. Fortunately, you don’t need a workshop full of expensive power tools or a massive budget to bring that rustic, inviting charm into your home. With some basic lumber, simple craft supplies, and a bit of creativity, you can build stunning lanterns that elevate your space for a fraction of the cost. Whether you are aiming for a farmhouse-inspired look, a modern minimalist vibe, or an industrial aesthetic, these projects prove that high-end style is easily achievable on a DIY budget.
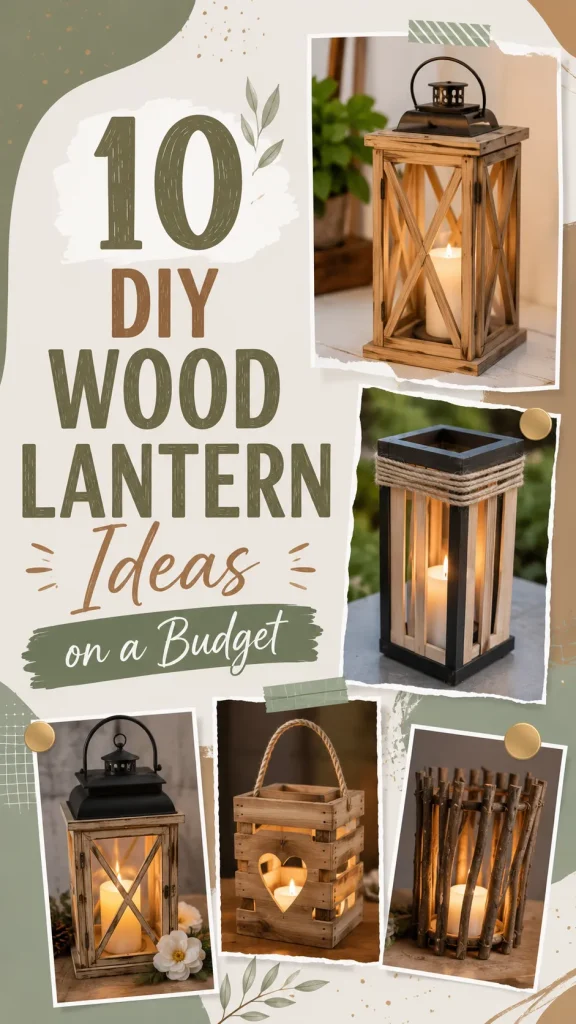
These DIY wood lantern ideas focus on utilizing inexpensive materials like paint stirrers, thin hobby wood, and basic pine strips. By focusing on smart design and simple assembly, you can create a series of lanterns that look like they belong in a boutique showroom. Let’s dive into ten creative ways to brighten your space without breaking the bank.
1. Paint Stick Farmhouse Lantern
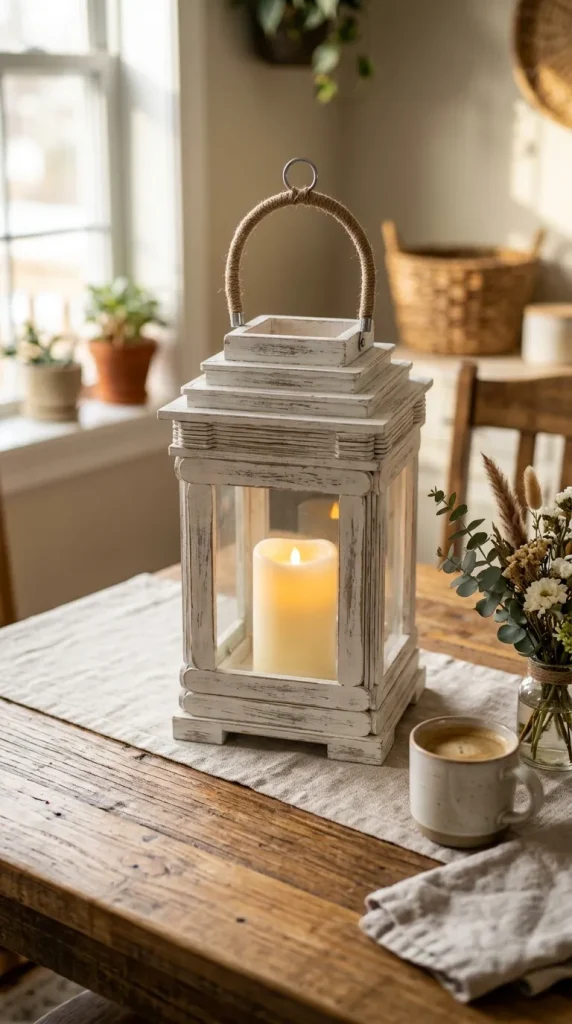
The ultimate budget hack, paint stirrers are almost always free or pennies at your local hardware store. Their thin, lightweight nature makes them perfect for creating delicate, lantern-style frames. This project focuses on a light, airy aesthetic that works beautifully for weddings, porch decor, or as a centerpiece on your dining room table.
How to Make
Start by gathering 12 to 16 clean paint stirrers. Create four square frames by gluing the ends of four sticks together in a box shape. Once the glue has dried, stack these squares vertically, offsetting them slightly if you want a tapered look, or stack them perfectly for a straight tower. Use a strong wood glue and small finishing nails to secure the layers. Sand down the edges for a smooth finish and apply a coat of white-wash or matte black paint. Place a battery-operated LED pillar candle inside for a flicker-free glow.
Things Needed
- 12–16 paint stirrers
- Wood glue
- Small finishing nails
- Sandpaper (medium grit)
- White-wash or matte spray paint
- Battery-operated LED candle
2. Hobby Wood Minimalist Cube
For a modern, high-fashion look, thin balsa or basswood strips are incredibly affordable and easy to cut with just a hobby knife. This project focuses on clean lines and geometric simplicity, making it perfect for an entryway or a modern living room setup.
How to Make
Purchase square dowels from a craft store. Measure and cut them into 12 identical lengths. Assemble the cube by creating two square bases first, then connecting them with four vertical posts. Ensure your angles are square by using a corner clamp or a simple DIY guide. Once the structure is complete, stain it with a light oak or walnut finish to give it a rich, expensive look. Because the structure is open, it creates beautiful geometric shadows when used with a bright LED candle.
Things Needed
- 4–6 square wood dowels (1/4 inch thick)
- Craft hobby knife
- Wood glue
- Corner clamp (optional)
- Wood stain
- LED tea light candles

3. The Rustic Pallet Lantern
If you have access to old wooden pallets, you have an endless supply of free, weathered wood. The natural grain and imperfections in pallet wood add a level of authenticity and history that you just cannot buy in a store.
How to Make
Carefully pry apart pallet slats, ensuring you remove all rusty nails. Cut the slats into equal lengths for the sides of the lantern. Use a butt-joint method to connect the sides, keeping the rough side of the wood facing out for a true rustic feel. Create a simple base from a thicker piece of scrap wood. For the top, you can create a small pyramid shape or simply leave it open for better light projection. Leave the wood raw or lightly brush with a clear wax for protection.
Things Needed
- Pallet slats (reclaimed)
- Hammer and crowbar
- Wood glue
- Clear furniture wax
- Battery-operated flickering candle

4. Picture Frame Lantern
Upcycling old picture frames is a brilliant way to create a lantern with “glass” walls. You can find these at thrift stores for as little as a dollar. This design gives you a substantial, heavy-duty lantern that looks perfect on a hearth or patio.
How to Make
Remove the glass and photos from four frames of the same size. If the frames are different, keep them to create a eclectic “shabby-chic” lantern. Glue the frames together at the edges to form a box. Use strong, heavy-duty wood glue and secure with painter’s tape while it dries. For the roof, use four triangles cut from a piece of thin plywood to form a pyramid top. Paint the frames a neutral color like cream or grey and distress the edges with sandpaper for a worn-in look.
Things Needed
- 4 identical wooden picture frames
- Thin plywood for the roof
- Heavy-duty wood glue
- Painter’s tape
- Sandpaper for distressing
- LED pillar candle

5. Screen Door Mesh Lantern
Adding a layer of fine mesh to a wood lantern adds a soft, diffused quality to the light, creating a very relaxing atmosphere. This project mimics high-end metal lanterns but uses inexpensive wooden frames.
How to Make
Build a simple box frame from 1×2 pine boards. Instead of leaving the sides open, staple a layer of fine, dark-colored wire mesh or screen door material to the inside of the frame. The mesh creates a “filtered” light effect. Paint the wood frame a deep bronze or copper to match the tone of the screen material. This works perfectly as an outdoor lantern for a porch, as the mesh provides some protection for the candle.
Things Needed
- 1×2 pine boards
- Dark-colored window screen mesh
- Staple gun
- Metallic bronze spray paint
- LED outdoor candle

6. The “Lantern Box” Tabletop Centerpiece
Sometimes you don’t need a tall lantern; a long, rectangular lantern box works perfectly as a centerpiece for a long dining table. It keeps the decor low enough for conversation while adding a beautiful, warm light source.
How to Make
Use one long piece of cedar or pine. Create a long box structure using thin strips to define the sides. Use a spacing jig—like a small block of wood—to ensure your vertical slats are placed at perfectly consistent intervals. Stain the wood a dark color for a sophisticated feel. Because the box is long, you can place three or four smaller LED candles inside for a balanced, glowing light that spans the entire center of your table.
Things Needed
- 1×4 pine or cedar board
- Thin wood lattice strips
- Wood glue
- Spacing block
- Dark walnut stain
- Multiple LED tea light candles

7. Geometric Dowel Pendant Lantern
Why set your lantern on a table when you can hang it? This project uses wooden dowels to create an open, airy structure that acts as a modern piece of decor. It is lightweight and perfect for hanging in a corner or near a window.
How to Make
Cut long dowels into varying lengths to create a geometric polygon shape (like a dodecahedron or a simple tetrahedron). Drill holes into the ends of the dowels and thread them together using jute cord, or simply glue them at the joints if you prefer a rigid structure. Hang a single large LED bulb from the center using a cord kit. The wooden dowel frame acts as a modern, sculptural cage for the light.
Things Needed
- Long wooden dowels
- Jute cord or strong wood glue
- Battery-operated hanging light kit
- Light sandpaper
- Clear coat finish

8. Glass Jar and Wood Crate Hybrid
This project combines the warmth of wood with the classic, nostalgic feel of a glass jar. It is the perfect project for a beginner because the glass jar provides the structure, and the wood is simply the “frame.”
How to Make
Build a simple wooden base and a matching top handle assembly. Connect them with four thin wooden posts. Place a large Mason jar or even a cleaned pasta sauce jar inside the cage you have created. The wood protects the glass and creates a beautiful, rustic “housing” for the jar. Fill the jar with fairy lights instead of a traditional candle for a magical, firefly-like effect.
Things Needed
- Glass jar
- 4 thin wood posts
- Wooden base and top plate
- Fairy string lights (battery operated)
- Wood glue
- Stain or paint

9. Lattice-Work Corner Lantern
If you have a dark corner that needs brightening, a corner-specific lantern is the perfect fix. This project is built specifically to sit flat against two walls, saving space and creating a stunning focal point.
How to Make
Build two sides of your lantern at a 90-degree angle rather than a square. Use lattice-work strips—which are incredibly cheap at home improvement stores—to create a pattern on the front face of the lantern. Assemble the back panels out of a solid piece of scrap wood so the lantern sits flush against the wall. Stain or paint the lattice white to pop against a colored wall. Use a bright LED candle to ensure the light catches the intricate lattice work.
Things Needed
- Wood lattice strips
- Scrap wood (for back panels)
- Wood glue and small nails
- White semi-gloss paint
- LED pillar candle

10. Floating Plank Lantern
This is the most minimalist and modern lantern idea. It uses a single wooden plank as a base and thin, vertical slats to create a “floating” look that is very high-end and designer-inspired.
How to Make
Take a single, thick plank of wood and drill a hole in the center for the candle base. Then, build a light frame out of very thin wooden strips that extend upward from the base. Because the frame is so light, it looks like it is hovering above the plank. Keep the design natural and finish with a simple beeswax polish. It is simple, fast to assemble, and looks like something you would find in a high-end Scandinavian home store.
Things Needed
- Single thick wood plank (base)
- Thin wood strips (frame)
- Drill and hole saw
- Beeswax polish
- LED pillar candle

Conclusion
Building your own DIY wood lantern is one of the most rewarding home decor projects you can undertake. Not only do you save a significant amount of money compared to buying retail, but you also gain the satisfaction of creating a piece that fits your home’s specific aesthetic perfectly. Whether you opt for the simplicity of paint stirrers or the rustic appeal of reclaimed pallet wood, the results are always warm, inviting, and uniquely yours. Remember, the beauty of DIY is in the process; don’t be afraid to distress the wood, experiment with different stains, or add your own personal flair with hardware or unique candle choices. By starting with these ten budget-friendly ideas, you are well on your way to adding that perfect, cozy glow to every room in your home.
