10. Cardboard and Mulch Sheet Path
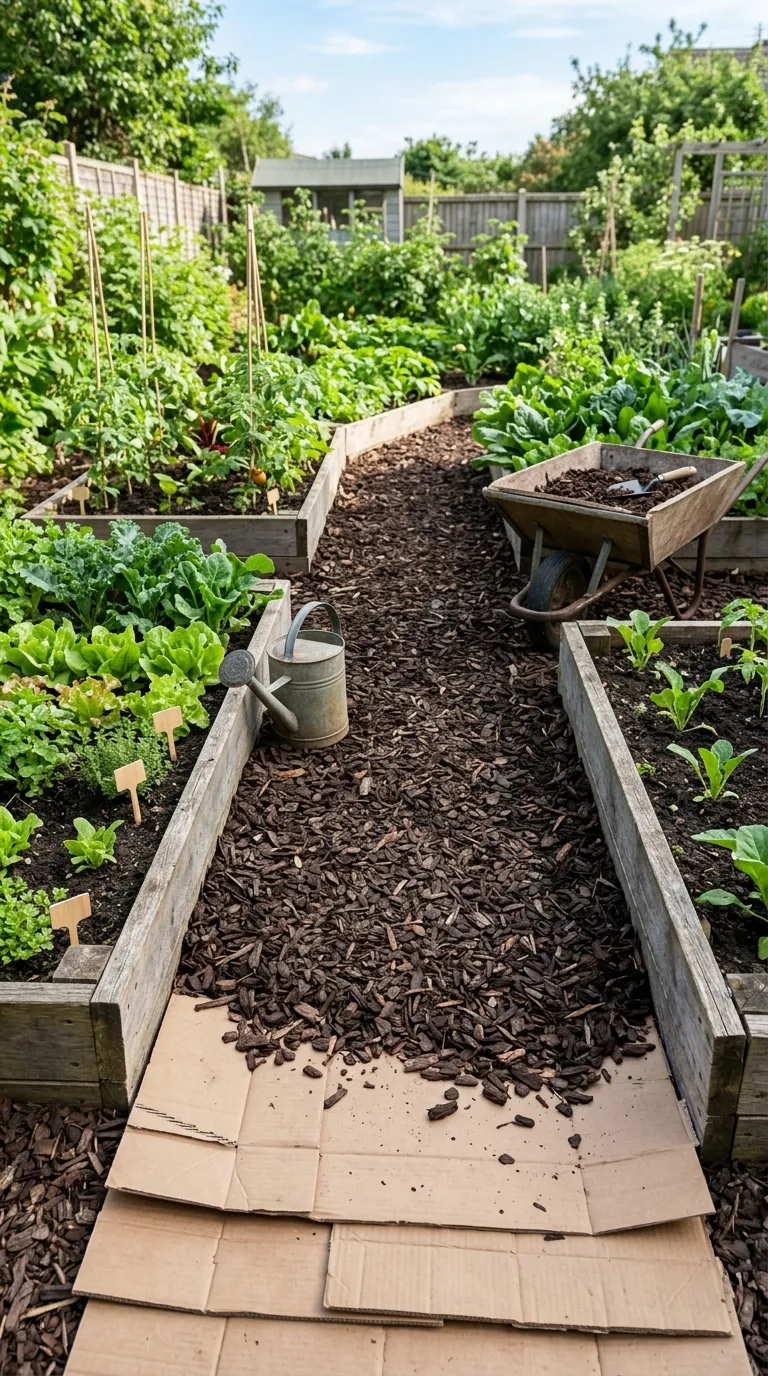
Not every path needs to be permanent. If you’re still deciding how the garden should be laid out, or you just want to stop walking through mud this season, a cardboard-and-mulch path is the fastest, cheapest option on this list.
What you’ll need:
- Flattened cardboard boxes — remove all tape, staples, and labels
- Wood chips, bark mulch, or shredded prunings
- A hose or watering can
- A wheelbarrow and rake
Mow or trample down any tall growth, then lay the cardboard in overlapping sheets with at least 15cm of overlap at every join. Soak it thoroughly until it’s sodden and moulds to the ground. Spread 7 to 10cm of mulch on top and rake it level.
Time: one to two hours. Difficulty: beginner-friendly.
The cardboard blocks light and smothers weeds underneath while slowly breaking down and feeding the soil. Top it up with fresh mulch once or twice a year, and after a couple of seasons you’ll have a weed-free strip that’s ready for planting or gravel. Avoid glossy, waxy, or heavily printed card, which breaks down poorly.
💡 Pro Tip: Lay cardboard paths in autumn and let winter rain and worms do the work. By spring the ground beneath is soft, crumbly, and far easier to dig.
Frequently Asked Questions
What recycled materials work best for a garden path?
Brick, concrete, slate, and roof tiles are the most hard-wearing and best suited to daily foot traffic. Pallet wood and log slices work well for lighter use and dry conditions. Bottles, tyres, cardboard, and plastic bottles are best for edging, decorative details, or hidden base layers rather than as a main walking surface.
Do I need a weed barrier under a recycled material path?
It depends on the material. Solid surfaces laid tightly together with sand-filled joints block most weeds on their own. Gravel, bark chip, and mulch paths benefit hugely from a woven landscape fabric underneath — not the thin, perforated plastic sheeting, which tears and stops water draining.
How do I stop my DIY garden path from sinking or shifting?
Almost every sunken path comes down to poor ground preparation. Dig out the topsoil and organic matter, then compact the exposed subsoil hard before adding any bedding layer. Edging on both sides — timber, reclaimed stone, or even a row of bottles — keeps loose materials from spreading outward.
Are old pallets safe to use in the garden?
Heat-treated pallets marked “HT” are generally considered fine for garden use. Avoid pallets stamped “MB”, which indicates fumigation with methyl bromide, and be cautious with any pallet that has visible chemical staining or has been used to ship liquids. Sanding and sealing the wood adds another layer of reassurance.
Can I use broken brick and concrete in a wet climate?
Yes, and they often perform better than manufactured pavers because the irregular shapes and wider joints drain freely. The main thing is to lay them on a free-draining sand or gravel base rather than solid clay, and to keep joints topped up with sand so water doesn’t pool and freeze.
How much does a recycled material garden path cost?
Costs vary wildly depending on what you can source for free. If you collect pallets, bottles, and cardboard yourself and only buy sand, gravel, and a bag of concrete, a short path can come in under the price of a single bag of new paving. Salvage yards and online marketplace listings are usually the cheapest route for brick, slate, and tiles.
How do I maintain a path made from recycled materials?
Very little is needed. Sweep sand or fine gravel into joints once a year, pull any weeds that push through before they set seed, and re-oil wooden elements annually. Cardboard and mulch paths need a fresh top-up each season, and glass bottle edging benefits from a quick check after heavy frosts.
There’s a particular kind of pride in a path you assembled from things other people threw away. It fits your garden rather than fighting it, it costs a fraction of a bought-in kit, and no two are ever quite alike. Start with whatever material is closest to hand — a pile of bricks behind the shed, a stack of delivery pallets, a box of bottles waiting for the recycling bin — and let the path take shape around it.
Choose one project this weekend, measure out a short stretch rather than the whole garden, and see how it feels underfoot before you commit further. Add your own stamp: sort the bottles by colour, press a favourite broken plate into a stepping stone, or let thyme creep between the log slices. The path will look better for it, and you’ll enjoy walking it far more.