A garden path does more than get you from the back door to the veggie patch. It tells your feet where to go, keeps mud off your shoes, and gives a sprawling yard a sense of shape and intention. The trouble is that paving stones, kits, and bagged gravel add up quickly, and most of it arrives wrapped in plastic on the back of a truck.
That’s where 10 DIY garden path ideas using recycled materials come in. Old bricks from a demolished wall, pallets left behind by a delivery, bottles you’d otherwise rinse and bin, broken crockery, scraps of slate from a roofing job — all of it can become a walkway with far more character than anything flat and factory-fresh. Recycled paths also tend to sit lighter on the ground. You’re not pouring a slab or importing tonnes of new stone; you’re reusing what already exists and shaping it to fit your space.
Below you’ll find ten genuinely different approaches, from a heavy-duty brick-and-rubble route that will outlast your fence, to a low-effort cardboard-and-mulch trail you can lay in an afternoon. Each one lists what you need, roughly how long it takes, how tricky it is, and where people usually go wrong. Pick the one that matches the materials you can actually get your hands on — that’s half the fun.
Quick Answer: To build a garden path from recycled materials, choose a material that suits your climate and foot traffic, then prepare the ground properly. Broken bricks, salvaged concrete slabs, roof tiles, pallet planks, log slices, glass bottles, tyres, and even flattened cardboard can all be reused. The key steps are digging out weeds, compacting a firm base, laying pieces tightly with a slight gap for drainage, and filling joints with sand or gravel.
1. Broken Brick and Salvaged Rubble Path
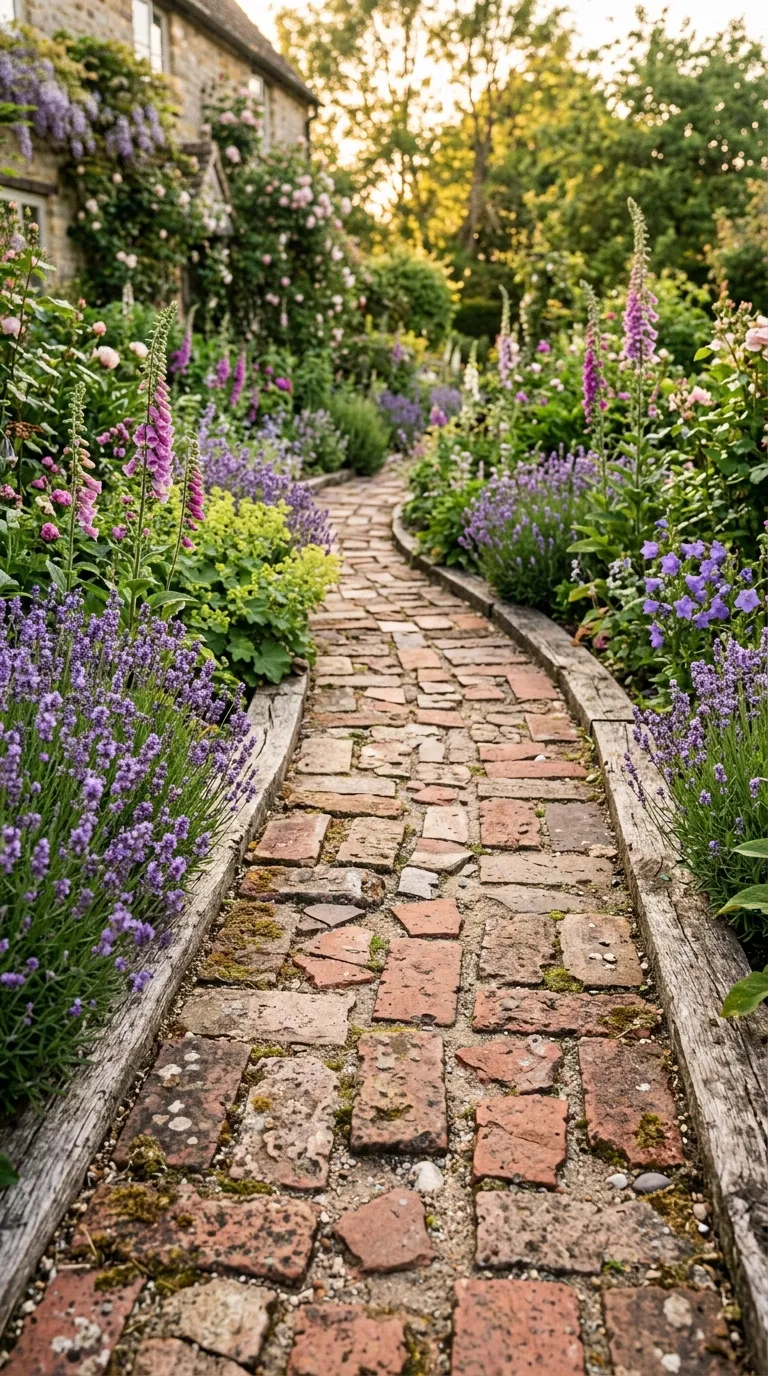
If you’ve ever knocked down a garden wall or watched a neighbour renovate a chimney, you already have the raw material for one of the most durable recycled paths going. Broken brick laid in sand has been used for centuries, and it only gets better looking as moss settles into the joints.
What you’ll need:
- Broken bricks, half-bricks, and clean rubble
- Sharp sand (about 5cm depth across the whole path)
- A tamper or a heavy piece of timber for compacting
- Rubber mallet, spirit level, and a stiff broom
- Optional: reclaimed edging stones or timber to hold the sides
How to build it:
- Mark the path and strip off turf or weeds to about 15cm deep.
- Compact the soil hard. This is the step people skip, and it’s the reason paths sink within a season.
- Spread a 5cm layer of sharp sand and level it roughly.
- Lay the brick pieces tight together in a random mosaic, tapping each one down with the mallet so it sits flush with its neighbours.
- Brush dry sand across the surface and sweep it into the gaps. Water lightly, then top up the sand once it settles.
Time: a full weekend for roughly 5 metres. Difficulty: moderate — it’s physical rather than fiddly.
You can steer the look by sorting your bricks. Reds and terracotta tones read warm and cottage-like; yellow stocks and greys feel more industrial. Herringbone takes longer but locks together tightly and handles wheelbarrow traffic well.
💡 Pro Tip: Wear thick gloves and knock the sharpest edges off broken bricks with a hammer before laying them. A path you can’t walk barefoot is a path you’ll avoid.